
There is never a good time to discover a leak in any ceiling of your home. Whether you managed to notice it at the first signs of discoloration or sagging plaster or were alerted by the sound of dripping water landing on a floor or piece of furniture, dealing with a ceiling leak can be extremely stressful.
Although you usually need to act fast to avoid further damage, there is no need to panic! In this article, we will take you through the process of fixing a ceiling leak step-by-step so that you can rest assured that your home and possessions are safe!
Step One: Catch any Dripping Water
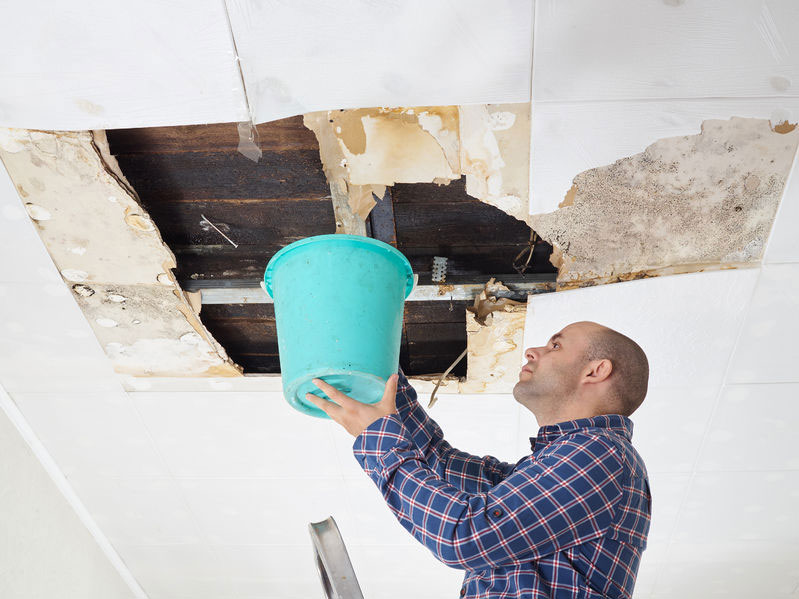
The first thing you will want to do after discovering a leak in the ceiling is to grab a bucket or other large container to catch the water. The larger, the better, as a larger container will fill more slowly and give you more time to fix the problem. If the container does fill, simply empty it down a sink or drain and place it under the leak again in the same position. It can also be worth placing towels around the edges of the container to catch any water droplets that may splash out of the container.
If you have caught a leak before the water has begun to drip, it may be a good idea to make a small incision in the ceiling wallpaper (or even in the plaster using a drill) in the center of the discolored area, to prevent water pooling behind the wallpaper or plaster and causing further damage.
Step Two: Identify the Source of the Leak
Almost all ceiling leaks come from one of two sources: your roofing system or your plumbing.
Roofing system leaks are typically found directly underneath the attic, and/or leaking into the attic itself from the roof. These leaks most typically appear during or shortly after it rains. Water from a roof leak is often dirty or discolored. If you suspect a leak from your roofing system, checking the attic for damp insulation can be a tell-tale sign.
Plumbing system leaks are usually below bathrooms or any other space where plumbing pipes are. Plumbing system leaks are more likely to produce clear, rather than discolored, water, and leaking is more likely to be a steady trickle than an intermittent drip.
Step Three: Fix the Leak Using a DIY or Professional Solution

To fix a roofing leak, go into the attic and find the spot where water is dripping. The damage to the roof may be directly above this spot, or even further towards the top of the roof if it is flowing down rafters or sheathing. Once you have located the exact source, pierce it with a metal wire, so it is visible from on top of the roof. If the leak is small, you may be able to (safely) climb onto your roof and plug the hole with a caulk gun and roofing cement. If the leak is bigger, or you are not comfortable doing this, it is best to call a professional roof repair contractor.
Plumbing system leaks are usually more complex and difficult to repair and require specific plumbing tools. If you discover a leak in your plumbing system, the best course of action is to call a professional plumber as soon as possible.
The most important thing to do when discovering a ceiling leak in your home is not to ignore it, as the problem will only get worse and can end up causing expensive and even unsafe structural damage!


