
Gardening can provide countless health benefits. When you add this activity to your daily routine, you can eventually build your self-esteem, improve your heart health, reduce stress, and improve your hand strength. Gardening is also good for the whole family, as this can be a bonding activity and encourage everyone to eat clean and healthy meals.
For you to continuously enjoy the benefits of gardening, starting your own compost bin is a must. Compost bins are structures around your home that hasten the decomposition of organic matter and then using them as natural fertilizers for your plants. Composting at home enriches the soil, helps retain the moisture of your plants, and prevents diseases and pests. Using composts regularly also allows you to save money on buying commercially produced fertilizers.
If you need any help in starting your own compost bin, grab your landscaping supplies, roll up your sleeves, and follow these instructions:
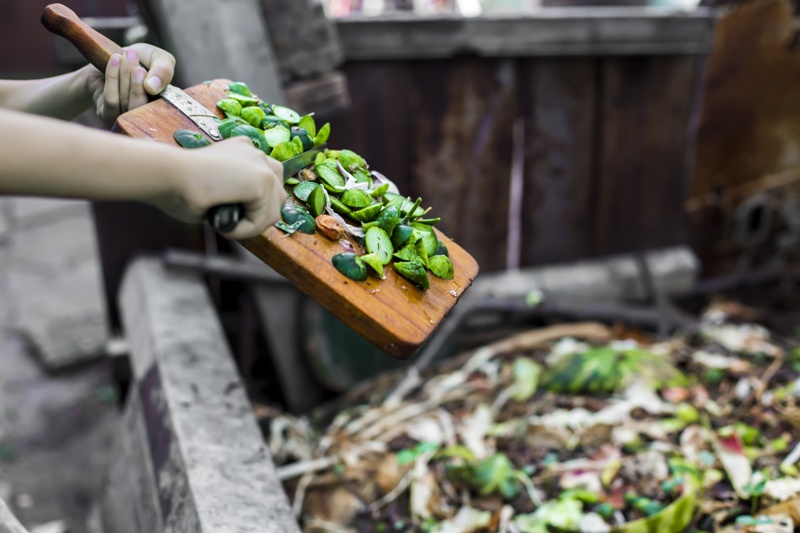
1. Combine Brown And Green Materials
For you to start your own compost bin at home, it’s important to collect enough organic matter and make a pile that’s at least 3 feet deep. Some of the most common brown materials you can include in this pile are fruit and vegetable scraps, shredded newspapers, hay or straw, and some wood shavings. Green materials, on the other hand, are coffee grounds, kitchen scraps, and animal manure (not from household pets such as dogs and cats).
You need to make sure that the compost bin has a balance between the two materials, as brown materials add carbon to the mix, while green materials provide nitrogen. For you to achieve this perfect balance, pay attention to the texture of your compost bin. If you notice that it’s too wet, consider adding more brown materials and aerate more often. If you see that your compost bin is extremely dry and brown, adding more green materials and water will make the mix more moist.
Although dairy and animal products are compostable, it’s important not to include them in your compost bin. These will easily smell and attract pests in your compost bin, so it’s best if you toss all of these into your garbage can. Moreover, you should not add any insect-ridden or diseased plant into your mix, as this can only contaminate your compost bin and make it unusable in the future.
2. Regularly Water Your Pile
Water plays a vital role in the success of your efforts in creating a compost bin. Adding too much water will drown the microorganisms in the materials and make everything waterlogged. Adding too little can cause the mix to dry out and prevent moisture from seeping in through the materials. When this happens, your mix will rot instead of composting.
For you to prevent this issue, regularly sprinkle water over your pile. You need to make sure that your pile retains the consistency of a damp sponge. You can assess the moisture of your compost bin by using your hand to reach the middle of the mix. If your compost bin feels warm, you’re on the right track.
3. Cover With Anything You Have
For you to properly take care of your compost bin and properly lock in moisture, you need to cover the mix with plastic sheeting, carpet scrap, or wood. This process will also protect your compost bin from excessive heat and prevent it from being over-watered in the rain. Remember, your compost bin should be moist, not sodden or soaked.
4. Stir Up Your Pile
As mentioned, a successful compost bin has the perfect balance of carbon and nitrogen. An imbalance between the two will rot your compost bin, putting all your efforts down the drain. Aside from regularly watering your compost bin, it’s also important to stir up your pile. This is especially important during the growing season.
Stirring up your pile using a garden fork is vital because it provides oxygen to the materials mixed. Ideally, you should turn the pile when its center feels too warm, or its temperature reads between 130 to 150 degrees. Moreover, stirring up your pile can also help the compost bin cook faster and prevent the materials from matting and creating an odor.
5. Feed Your Garden
There are obvious signs that can help tell you whether your compost bin is cooked and ready for use. If you notice that your compost bin is no longer giving off heat and becomes fully dry and crumbly, it’s a good sign that it’s ready to be fed to your plants.
Generally, you should add no more than six inches of compost to your flower beds or sprinkle it on top during each planting season. Remember to avoid putting too much as this can weaken the structure of your plants and prevent them from growing. Aside from this, it’s important to remember that compost doesn’t act as a soil replacement for your plants. Compost only works as a natural fertilizer in order to nurture your plants and soil.
Depending on your preferences, you can also make compost tea from your compost bin. This is a very simple process that will only require you to have water steep in your formed compost for several days. After that, you can strain your compost, and then use it as a homemade liquid fertilizer. Make sure to place the mixture in a handheld sprayer so you can easily use this in all your plants, especially those that are indoors.
Patience Is A Virtue
Starting a compost bin is easy, but for you to reap its rewards, you have to be patient with your efforts. Depending on the quantity and type of the organic matter you want to use, you might have to wait for weeks or months before all of these will decompose through moisture retention and proper aeration.
As long as you’ve started on the right foot with the process and will remain patient all throughout, it won’t be long before you can enjoy the wonders of a compost bin and healthy plants in your home!


