
Silicone caulk has various applications like sealing sink and bathtub surrounding joints, waterproofing, etc. This is because it’s extremely easy to use, flexible, durable, stable and highly versatile.
On the downside, silicone caulk is so sticky, thus making it difficult to spread out uniformly. Due to that, achieving a smooth and uniform finish can be a challenge. Don’t’ worry though!
With the right techniques, you can always give your caulking a smooth even finish. That’s said, we’re going to give you 7 tips on how to smooth 100% silicone caulk bead joints professionally ever!
Supplies Needed to Smooth Silicone Caulk
- Masking tape
- Ethyl/Rubbing alcohol
- Spray bottle
- Caulk finishing tool
- Cotton rags
- Shop vacuum
- Caulking gun
- Scraper razor blades
- Putty knife
7 Tips for Smoothing Silicone Caulk
Clean the Caulking Surface
If you’re a DIYer, getting your hands on caulking for the first time, heed this warning! Surface preparation and old sealant removal is very essential to caulk like a pro. You’ll need to clean and prepare the caulking surface you’re about to apply a new bead on.
To accomplish that, use a retractable razor blade to scrape off the old caulk.
As an alternative, you can use a putty knife, but that will depend on the location and age of the sealant. For corners and joints, use a caulk finishing tool to prepare the surface.
Next, use a vacuum to clean the surrounding area and remove all debris from the surface. Lastly, use rubbing alcohol and a rag to wipe the surface clean. Let the surface dry thoroughly before you can apply a new bead.
Use Masking Tape (Optional)
After removing the old caulk, apply strips of masking tape at the edges of the caulking surface. This will prevent your new caulking bead from smearing, giving you clean results.
More importantly, the tape provides a straight line to guide you while caulking. I’d recommend that you use a ¼” masking tape since it provides excellent results.
Make sure you press down the tape along its inner edges. Here, you can use a wooden Popsicle, craft stick, or your fingernail. This helps to seal the edges tightly, thus preventing the sealant from seeping beneath it.
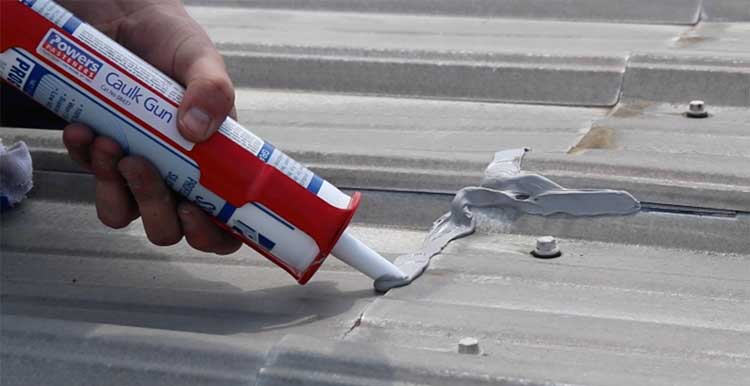
Apply the Silicone Caulk
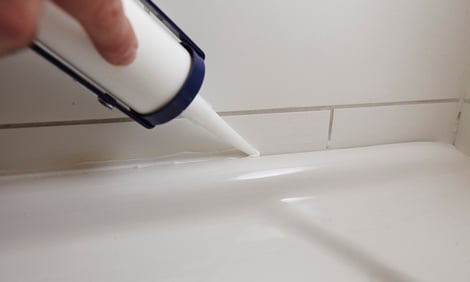
Now that you’ve masked off the surface, it’s time to apply a new caulk bead. First, cut the tip of the cartridge’s nozzle at an angle of 45-degree with a utility knife. Now, punch the inner seal of the nozzle with a pin.
Next, load the tube in a caulking gun and start triggering pointing the line. To apply a smooth caulk bead on the surface try to find the ideal balance between application speed and pressure on the gun.
The speed may vary according to the joint’s size, but the pressure should always be constant. Also, hold the caulk gun at the same angle and keep it moving along the joint line.
Once you get at the end, lift the tip from the caulking surface and release the handle. Wipe off the excess sealant on the tip before you apply a new bead.
Use Lubricator Spray on the Bead
Put some denatured alcohol in a spray bottle. Then spritz a fine mist of alcohol over the new sealant bead. The alcohol works as a thinning agent and acts as a lubricant to enhance the surface finishing process.
So it’ll enhance the silicone finishing much more effectively. Although, you can always skip step and go ahead with a silicone smoother pad. However, the lubricator will make it more efficient in our opinion.
Smooth the Silicone Caulk
Before the denatured alcohol evaporates, use a silicone finishing tool along the sealant bead. Apply gentle pressure and move forward steadily. Don’t rush just keep moving slowly for smoothing the silicone precisely.
Alcohol will reduce the amount of sealant sticking to the tool. However, some caulking will still adhere to it. So, stop and wipe it off once in a while.
Then start again at 1-inch back from where you stopped. This will prevent your bead from having bumps when you stop and start again. Repeat this process about 2 to 3 times to achieve a perfectly smooth finish.
Alternatively, you can smooth the sealant with latex gloves or a Popsicle stick. This approach is preferred when you’re working on super sticky poly caulk. You just need to wet the caulking tool from time to time.
Remove Excess Caulk & Masking Tape
If there is excess silicone sealant on the surface, wipe it off with a rag dipped in alcohol right away. Don’t let it dry, since you may be forced to use caulk removal tools. Also, remove the masking tape if you had it applied earlier.
However, you need to pull it away slowly at an angle to avoid damaging the caulk bead. On the same note, don’t let wet sealant from the masking tape get onto the nearby surfaces.
Let the Caulk Cure
Let your sealant cure fully according to the manufacturer’s directions before you paint or get it wet.
In most cases, sealant takes about 24 hours to dry. However, understand that there is a difference between cure time and dry time. Cure time refers to the period the caulk should take before you expose it to water.
While dry time refers to the period within which you can paint over it. Silicone sealant may need several days to cure fully.
Conclusion
Apart from getting a smooth finish, smoothing will enhance caulking surface adhesion. Fortunately, the process isn’t very complicated as you can see. Just follow the right procedures and you will achieve a professional finish.
However, the application process will leave you with a rough surface if you get the process wrong. So, make sure you follow the above steps to smooth silicone caulk.


