
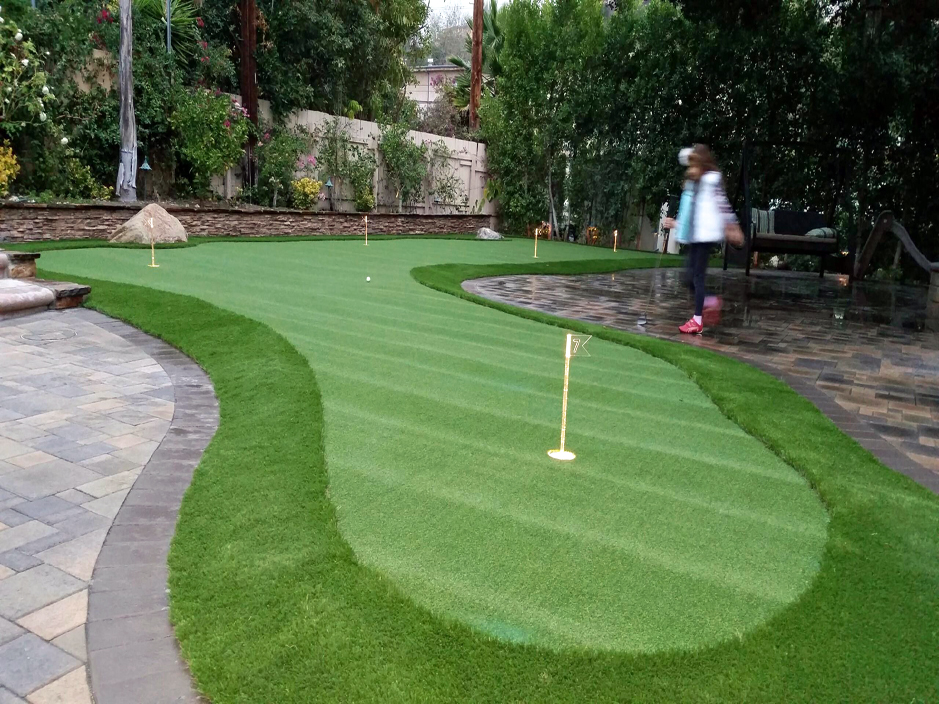
It is every avid golfer’s dream to have his or her own putting green at home. Imagine the elation of putting around your own mini golf course and being able to golf with friends and family right at your own turf.
Of course, driving your trusty golf cart around a large golf course and enjoying the thrill of a putt with your club friends is still a league of its own, but it’s not all the time that you have the luxury to practice what you love.
What most golfers are not aware of is it’s actually possible for you to build your own putting green at home. If you have adequate space in your yard, the necessary tools, and the budget for a turf, then you can start realizing your golfer’s dream.
Read on to learn how you can transform your yard into an amazing patch of putting green for the most amazing home golf tournaments.
Why Build Your Own Putting Green?
There are many reasons to take your golfing hobby home.
If you have small kids, having your own mini golf course at home can introduce your kids to your own hobby. Who knows? It can become that ultimate family recreation that you can bond over and have fun doing together. It’s a great activity to get your kids into sports.
For starters, you can include your kids in the process of creating your own putting green. Kids are naturally curious, and they will enjoy taking part in a grand project like this.
On weekends, you can invite some friends over. And when you feel like taking a few putts but don’t have the time to go to the course, you can always step right out and have fun at your own turf.
Having your own course also helps you practice your strokes whenever you want to. On top of that major convenience, the course can even add value to your home.
Approaches to Making Your Own Golf Course
Before you start building your own putting green, know that you have the option to build a more temporary golf course. A temporary golf course can be built indoors and outdoors and with materials from almost anything that your working imagination can bring into the table.
You can incorporate the simplest materials around the house, like painter’s tape to create markers, random household objects as obstacles, books to serve as ramps, cups to serve as the holes, and putters.
Then, you can freely create your own map of the course in your own yard. Employ your kids’ help. They will love getting involved in the process.
This is a fun alternative for when you’re not yet decided on whether to transform your yard to a full mini golf course or when you’re still taking your time getting all the planning and material purchasing done.
When you’re ready to take on the project, it’s time to get serious and map out all the steps necessary to see your project to completion.

Building Your Own Putting Green: A Step-by-Step Process
When deciding to create your own backyard putting green, you will have to decide whether to use a real turn or opt for synthetic. Although there’s no comparison to the beauty of a real turf, a synthetic turf is mostly preferred by homeowners. This is because synthetic turfs don’t require the laborious maintenance that natural turfs do.
You don’t have to worry about keeping the grass healthy and green, regularly cutting and trimming them, and ensuring that they are watered properly. As long as your synthetic turf is properly installed, you can do away with the problems presented by rain, snow, heat, and other seasonal changes.
After you decide on that, it’s time to proceed to the process. Here’s a step-by-step guide on how to accomplish your own putting green. These steps are adapted from the experts at Hunker.
Step 1
Decide on how big you’d want your putting green to be. Then pick up a desired shape.
Step 2
Select a location in your yard that is preferably level field so as to prevent the area from accumulating water. You may have to do a little landscape changes if you can’t find the perfect spot. Once you have that ironed out, clear the area to match the size of your putting green.
Step 3
Draw an outline of your putting green using a chalk or a landscape paint.
Step 4
After outlining, dig out at least four inches of dirt from the target area. Remember to keep the dug-out area plain and leveled.
Step 5
Pour a layer of crushed gravel to your dug-out location. Then run a lawn roller or tamper over to keep the surface even. This will prevent the area from soaking in water and flooding and help the water drain properly.
Step 6
Pour a layer of limestone or other similar materials, like stone dust, to compact the area.
Step 7
Now, it’s time to dig the holes for the cups. Use a small trowel to dig out the holes and glue the cups into the substrate using fast-drying concrete.
Step 8
Take your putting green, and carefully lay it out on top of the solid layer of gravel and limestone. Then, use sod staples to keep the green in place.
Step 9
With a push broom, brush the surfaces of the green. Then, load a drop spreader with sand, and pour a layer across the green.
Step 10
Feel for the holes that you dug into the base of green. Then, ever so carefully, cut an X shape on the holes with a utility knife and trace the shape of the cup’s edges.
Final Word
Creating your own putting green is a fantastic little project that is actually really easy to do. Excluding the planning phase and accounting only the period of construction, you can successfully build your putting green in a matter of days.
Use this guide, and start enjoying your own putting green soon.


